Peppernuts

When I was 14, my mom, grandma, and I took a 3-day road trip to Iowa to attend Schmeckfest – a festival celebrating the cuisine of Germans-from-Russia, our ancestors.  I’m not sure how many teenagers would be willing to drive 16 hours each way with her mom and grandma to essentially eat a lot of food, but my love of food goes back to infancy, so naturally, I was thrilled.  Among the classic dishes served (strudel, kuchen, lots of sauerkraut), one distinct memory I have from the trip was eating peppernut cookies.

A cookie with pepper in it seems weird, I know (and weirder yet, these contain no nuts!), and the fact that you roll them out into little worms?  Weird, too.  But the thing is, you end up with these tiny, spicy, crunchy little cookies that you could seriously eat by the handful.  There are tons of peppernut recipes out there, but this is my favorite because there’s a lot of great spice happening.

I’ll also note that these are great cookies to make with kids because the worm-rolling is totally fun and uniformity isn’t really important.  My toddler also loves that they are the perfect size of cookie for a doll or stuffed animal.  Excellent at a tea party.

Peppernut Cookies

1/2 cup butter, softened

2 cups brown sugar

1 egg

1 tsp. anise oil

3 cups flour

2 tsp baking soda

1/2 tsp cream of tartar

1 tsp cloves

1 tsp cinnamon

1 tsp nutmeg

1 tsp mace

1. Preheat oven to 350.  Stir the dry ingredients together (flour, baking soda, cream of tartar, and spices).  Beat the butter and sugar together until fluffy, then add the eggs and anise and beat for another minute.

2. Slowly add the dry ingredients.  If the dough gets too dry, add in a little water (you shouldn’t need more than 1/4 cup).

3. When the dough is workable, roll it into a long rope (a ‘nake, as my daughter calls it).  Cut the snake into small, 1/2-inch pieces, transfer to a baking sheet, and bake for about 8 minutes, until they just begin to get crispy.  Allow them to cool on the pan.  I let the cookies dry out overnight before transferring to a jar or airtight container.

Chili Macaroni

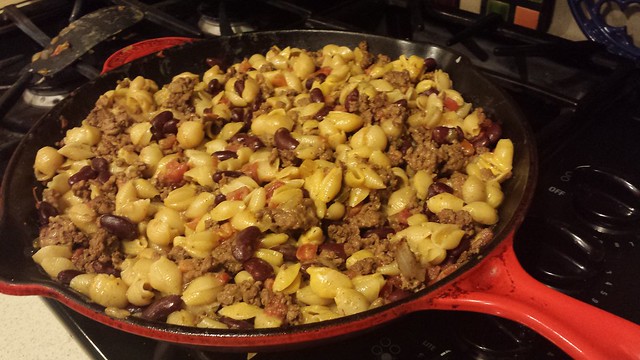
I’m borderline embarrassed to share this recipe with you.  I mean, it’s probably the easiest thing ever to make, there’s nary a vegetable to be found, and yeah, processed cheese food is not real food.  However, sometimes you just want to make something comforting, and although it’s good, quinoa and grilled fish isn’t comforting.  The marriage of chili and macaroni and cheese is the epitome of comfort and perfect for a cold Monday night when you just want to carb up and hibernate.

In my family, Velveeta Shells & Cheese stands head and shoulders above Kraft Macaroni and Cheese, so that’s what I use.  The powdered cheese makes me a little twitchy.  Enjoy and, if it makes you feel better, serve a nice salad with it.

Butter is my Jam

Chili Macaroni

1 family sized box of Velveeta Shells & Cheese

1lb ground beef

half of an onion

2 garlic cloves

1 tsp chili powder

1 tsp cumin

1 tsp salt

1 can rotel

1 can kidney beans

grated cheddar and sour cream for serving

1. Prepare the shells and cheese according to package directions.  Dice the onion and mince the garlic.  Brown the meat in a large skillet over high heat and add the onions, garlic, chili powder, cumin, and salt.  Stir to make sure the spices are well-distributed.  Continue to cook until the meat is cooked through.

2. Add the beans and rotel to the skillet, continuing to cook and stir for about 3 more minutes.  Pour in the macaroni and cheese, stirring the entire mixture together (this can be done in a large bowl if it won’t fit in your skillet).  Stir until all ingredients are incorporated.  Serve with sour cream and grated cheddar on top.

Roasted Strawberry Coffee Cake

If Robin could eat one food for breakfast, lunch, and dinner it would be strawberries.  She requests them every time she is hungry and prefers them cut in half with the “leafs” cut off.  She can easily eat a half pound in one sitting, so we do try to limit her intake, but I pretty much buy a box or two every time we go to the grocery store.  Lately our strawberries have been fantastic at the store, and on sale!  To that end, I can make this coffee cake with things I have on hand.  It comes together really quickly and has the perfect coffee cake texture and isn’t too sweet.  You could really use any amount of strawberries you have – I used a 1lb carton with a few strawberries eaten out, but anywhere from half to a whole pound would work.

I baked mine in a cast iron skillet and I’d recommend you do the same, just for rustic appeal and because you don’t have to worry about greasing it.

Roasted Strawberry Coffee Cake

1/2 to 1 lb fresh strawberries

1T olive oil

2T maple syrup

1/4tsp salt

2.5 cups flour

1T baking powder

1/2 cup sugar

1/2tsp salt

2 eggs

1.5 cups buttermilk

4T melted butter (plus an extra T for the skillet)

1/2 tsp almond extract

1. De-leaf and quarter the strawberries. Whisk the syrup, olive oil, and salt together in a small bowl and toss the strawberries in the mixture until they are coated.  Spread the strawberries out on a baking sheet with parchment paper (unless you want to scrub strawberry goo off of your favorite cookie sheet) and bake for 40 minutes at 350.  Stick your cast iron skillet underneath the pan to heat up while the strawberries roast.

2. Stir the flour, sugar, baking powder, and salt together in a mixing bowl.  Whisk the eggs, buttermilk, melted butter, and almond extract together in a small bowl.  Pour the wet ingredients into the dry ingredients and stir together until smooth.

3. When the strawberries are done, turn the oven up to 400.  Melt the remaining T of butter in the bottom of the skillet and swirl it up the sides.  Then pour the batter in the skillet.  Spread the strawberries on top and return the skillet to the oven for 25 minutes or so.  Allow the cake to cool in the skillet.

Source: adapted from Joy the Baker 

Mahi Tacos with Pineapple and Mango Salsa

Today in Texas the weather is absolutely gorgeous – it’s warm, sunny, and a welcome change from the last two weeks of cold rain.  That kind of weather makes me want really fresh-tasting food, like pineapple.  Truthfully, I love pineapple all times of the year, but it just doesn’t speak to me on a freezing rain kind of day.  These tacos will definitely brighten up your weekend.  There are basically 3 components: the fish, the sour cream sauce, and the pineapple salsa.  I had planned to serve it with some chips and guacamole, but of the three avocados I purchases this week, two of them were absolutely hard as rocks.  Robin and I ended up sharing the good one and we skipped the sides.

As a side note, avocados are one of my absolute favorite foods of all time, but they are perpetually disappointing to me.  They are so expensive and so often they are terrible inside (and I am a fairly good judge of their ripeness).  A quality avocado is such a gift – so sharing it with my avocado-loving toddler is a true treat.

Mahi Fish Tacos

for the fish:

1 lb mahimahi fillets

1/2 T cumin

1/2 T chili powder

1 tsp salt

1/2 tsp pepper

Swig of olive oil

For the sauce:

1 cup sour cream or Greek yogurt

1 lime

For the salsa:

1/4 of a fresh pineapple or 1 can of pineapple chunks

1 mango

1 jalepeno pepper

1/2 small red onion

2T red wine vinegar

Flour tortillas

1. Stir the cumin, chili powder, salt, and pepper in a small bowl.  Rub the spices onto the fish fillets, coating each side.  Heat the olive oil over medium-high heat and pan fry the fish for a few minutes on each side.  Transfer to a paper-towel on a plate and flake.

2. Zest and juice the lime and add the zest and the juice to the sour cream to make a sauce.  It’s the easiest sauce ever.

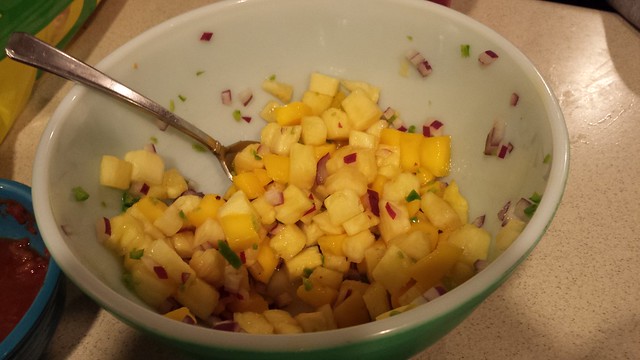
3. Dice the mango and pineapple, mince the jalepeno pepper and finely dice the red onion.  Put the mango, pineapple, and onion in a small bowl, and stir in half of the jalepeno.  Sprinkle the vinegar on top and taste – of it needs more heat, add the rest of the jalepeno.

4. Warm the tortillas and top with the flaked fish, the salsa, and drizzle with sour cream sauce.

Source: adapted from Keepers by Kathy Brennan and Caroline Campion

Baked Potato Soup

As expected, Punxsutawney Phil saw his shadow a few weeks ago,  predicting six more weeks of winter, so we have a little more than a month to go.  A North Texas winter is really not much to complain about when I see temperatures that are actually BELOW zero across the country, but we are truly ill-equipped to deal with it.  We don’t own coats, our homes are lacking insulation, and gosh darnit, our blood is thinner!  So, when I say it’s 29 degrees here today, know that I’m truly suffering.

On a cold afternoon when I don’t want to emerge from my blanket cocoon by the fire to make dinner, a warm crock pot full of potato soup is really ideal.  This soup is minimal prep, maximum warm and delicious.  The lack of meat makes it pretty variable as far as when you want to prep it – it could probably go 8-10 hours on low, or 4-6 on high.  I put mine on high for an hour, then 3 on low.  You could top it with some crispy bacon if you wanted, but it was vegetarian night at my house (minus chicken broth, obviously).  I like mashing half of the potatoes to give the soup some texture, but if you want it all smooth you could mash all of them.

Baked Potato Soup

1 onion

1T butter

2 garlic cloves

1 tsp dried thyme

2 T flour

4 cups chicken broth (or vegetable broth)

6 russet potatoes

10 oz. cheddar cheese

1/2 cup heavy cream

3 scallions

1. Dice the onion, mince or press the garlic, and peel and cube the potatoes.  Melt the butter in a medium skillet over high heat and cook the onion, garlic, and thyme until the onion is browned.  Add the flour and stir together for a minute, then add 1 cup of the chicken broth and whisk.  Pour into the slow cooker.

2. Add the potatoes and the remainder of the chicken broth to the slow cooker and cook for 4 hours on high or 8 hours on low, until the potatoes are soft.

3. 20 minutes before serving, scoop out about half of the potatoes and mash (or rice) them.  Stir the cream into the mashed potatoes and return to the soup.  Grate the cheddar cheese and add 80% of it to the soup.  Stir while the cheese melts.  Season with salt and pepper.  Chop the scallions.

4. Serve the soup with a little grated cheese and scallion on top.

Cheese Blintzes for Sochi!

The Sochi Olympics have started and I really couldn’t be more excited.  For me, everything pretty much stops for the Olympics fortnight and I focus all of my time and energy on watching the games.  I cry at every medal ceremony, I fill our DVR with coverage, I refrain from the news to avoid spoilers, I wikipedia the official rules for curling – it’s really an obsession.  Ten years ago, for the opening ceremonies of the Athens games, my extended family had the brilliant plan of having a party to celebrate the opening ceremonies wherein we ate the host country’s cuisine (or at least our interpretation of it).  From that, a tradition was born and last night we celebrated our sixth opening ceremonies party.

Admittedly, when Russia was announced as the host country a few years ago, we were a little concerned about the meal because really, Greece, Italy, and China all have seriously good cuisine, but all we could think of for Russia was borscht, potatoes, and vodka.  However, tradition is tradition, so we planned a Russian meal and were pleasantly surprised that the meal was one of the best yet.  I’ll be sharing several Russian dishes over the next two weeks, but I feel like you need a really awesome Russian dessert to start things off.

The blintz has 3 parts – the crepes, the filling, and the topping.  You start by making the blintz, then you fill them, roll them up like burritos, and fry them.  For a topping I just cut up some strawberries and added a little sugar and vanilla and drizzled chocolate syrup, but I you could use any sweet fruit (berries, pears, apples).  Give them a try – you’ll feel so authentic watching ski jumping while eating blintzes.

IMG_5751

Cheese Blintzes

For the shell:

6 eggs

1.5 cups flour

1T sugar

1/4tsp salt

2 cups milk

butter to grease the pan

For the filling:

1 cup ricotta cheese

8oz. cream cheese, softened

1/4 cup sugar

1 egg yolk

1 tsp vanilla

juice of 1 lemon

for topping:

chocolate sauce

fruit

1. To make the blintz, whisk the eggs, flour, sugar, and salt until smooth with no lumps.  Stir in the milk to make a thin batter.  Heat a small frying pan (8″) over medium heat.  spread a bit of butter into the pan (I just use the stick and run it around the pan once in a circle.  Pour about 1/4 cup of batter in the pan and swirl it around to coat the bottom.  Allow the blintz to cook until the one side is done, then carefully flip to finish the other side.  It should be solid, but not brown.  It may take you a few trials to adjust your pan to the right heat and get the hang of frying and that’s OK – the batter will make a few more blintzes than you’ll need.  Set the finished blintzes on a plate to cool.

2. Stir the ricotta cheese, cream cheese, and sugar.  The filling can be a little lumpy.  Stir in the sugar, egg yolk, vanilla, and lemon to complete the filling.  To assemble, spoon a few tablespoons of batter onto one side of the blintz in a line.  Fold in the ends and roll like a burrito.

3. Once all blintzes have been assembled, butter a frying pan and brown the blintzes on both sides over medium heat until golden brown.  Serve warm topped with fruit, chocolate sauce, or both.


Chorizo and Mushroom Salad

In our house, dinner is the “big” meal of the day.  We usually do a quick breakfast, I make a really simple lunch, but I tend to focus most of my efforts (and appetite) on dinner because it’s the meal I eat with my whole family and my husband is usually starving when he gets home.  Typically our dinner is pretty filling, so with that in mind, this is NOT a recipe that would cut it in our house for dinner.  It is super easy, delicious,

Here are 3 situations where making this would be ideal:

1. You want a light, yet hearty lunch for a few friends.

2. You’re serving a light dinner, like quesadillas or sandwiches, and need a hefty side.

3. You spent your afternoon making a killer dessert and you don’t want to hear any nonsense about your diners being “too full for dessert”.

In my life, #3 is a real situation often – I hate when a great dessert is under appreciated.  Plus, these won’t leave you with a ton of dishes, either, so you can focus on the kitchen disaster at hand after making said dessert.

wpid-20140115_192633.jpg

Chorizo and Mushroom Salad

8 cups fresh spinach

8oz. chorizo

8oz. mushrooms (I used some shiitake and some button)

1 onion

3T olive oil

Juice of 2 limes

1/2 tsp dried oregano

2oz. goat cheese

salt and pepper

1. Preheat the oven to 425.  Dice the onion and chop the mushrooms.  Break the chorizo up into blobs on a rimmed baking sheet.  Scattter the onion and mushrooms around the pan, too.  Bake for 20 minutes, stirring the mixture every 5 minutes (so the onions and mushrooms gain some fat and flavor from the chorizo).

2. Whisk the lime juice, olive oil, oregano, and 2T of water together to make a dressing, season with a bit of salt and pepper.  Put the spinach into bowls for serving, then scoop the now cooked mushroom mixture over the top.  Drizzle with dressing and crumble a little goat cheese on top.

Crunchy Apple Pie

This week I had a special request for a recipe.  A neighbor from 20 years ago, one of my very favorite babysitting clients, contacted me for a recipe for apple pie to make for her boyfriend’s birthday this week.  I love a challenge, so of course, I had to make an apple pie this week.  The thing is, for being a mainstay in piedom, I haven’t made all that many apple pies in my day.  See, apple pie is my grandma’s pie.  Her signature – the one she always makes for holidays and always is amazing and so delicious that there would be no use in me making one.  In our family, we have a strong respect for one’s signature pie – my sister-in-law makes an amazing pecan bourbon pie, my grandma does apple pie, and my signature is cherry.  So basically, I have no business replicating my grandma’s apple pie, which is a classic 2-types of apples, cinnamon, sugar, and double-crusted.  Instead, I sought out a recipe that was very different, but still fit the bill of an awesome apple pie.  This pie truly delivers.  It tastes amazing, is pretty easy to put together, and the topping gives it a nice texture.

I made this with an all-butter crust, which is different from my usual crust.  It turned out really well.  I’m planning on doing a step-by-step tutorial on making your own pie crust in the future.  Obviously, a homemade crust is fabulous with this pie, but certainly not required.  Also note that the pie starts out looking ridiculously tall, but as it cooks, and especially cools, it will flatten down significantly.

wpid-IMG_20140201_190159.jpg

Crunchy Apple Pie

1 prepared pie crust (unbaked)

6 granny smith apples

1 lime (for juice)

1/2 cup sugar

4 T and 1/2 cup of flour, divided

salt

12 T cold butter (1.5 sticks)

1 cup brown sugar

1/2 cup oatmeal

1 cup pecans

1.  Preheat your oven to 375.  Peel and core the apples.  I use a vegetable peeler first, then one of those apple slicers that cores and cuts the apple into 8 slices.   This is the most time consuming part of the recipe.  Slice the apples into 1/4″ to 1/2″ slices (I just cut each of the 8 pieces in half).  Squeeze the lime over the apples and toss with the sugar and 4T of flour.  Set aside.

2. Cut the butter into the 1/2 cup of flour.  I slice the butter into 1cm sized cubes first, then mash it up with a pastry cutter.  Stir in the brown sugar and the oatmeal.  This mixture will be crumbly and dry, but that’s the way it’s supposed to be.

3. Arrange the apple slices into the pie crust.  Spoon the brown sugar/oatmeal/butter topping over the top.  You may have to use your hands to press the topping into the apples to make sure it stays put.  This may cause your pie to look really tall and precarious, but I promise it will flatten down.

4. Carefully transfer your crust to the oven.  Bake for 25 minutes and then check on the pie.  If the crust is beginning to brown, add some foil around the edge.  Rotate the pie 180 degrees (especially if you have an oven that has a hot spot).  Bake the pie for another 25 minutes.  During the second baking session, chop the pecans.  After the pie has baked for 50 total minutes, scatter the pecans over the top of the pie (I used an oven mitt to sort of pat them in).  Bake for 5 more minutes (55 total minutes of baking).  Allow the pie to cool for several hours and serve, ideally, with a scoop of vanilla ice cream.

January 2014

When I launched Butter is My Jam one month ago, I did not expect that so many of you (to the tune of 1000 hits!) would be reading, sharing, and cooking with me.  I love hearing that that you tried one of my recipes, so thank you for reading and following.  It’s really given me a vote of confidence to continue.  In all honesty, I started this blog because I am often annoyed by the way recipes are written and I wanted a place where I could rewrite them to have for my own use.  I love writing and cooking, so a blog seemed an obvious choice.

You may remember that my first post was a list of goals I want to accomplish before I turn 30 in December.  As part of my personal accountability, I thought I should do a little followup to let you know how things are going.

1. Learn to cook Asian food.

This month I tried a vegetable lo mein and shrimp wonton soup (I’ll be posting the recipe this week).  Both dishes were delicious and I’m excited to add more this month – I’m hoping to try hot and sour soup and egg rolls.

2. Run a 10k.

In the name of accountability, I joined the StrollerStrides run group and signed up for a 10k in March.  I’ve been running for 3 weeks and so far, it’s going really well!  I have done running programs on my own in the past, but typically find a way to postpone and never seem to meet my goals.  Joining a group has really helped to motivate me and make sure I get my runs in.

3. Incorporate pies into everyday life.

My new pie this month was an eggnog pie that had a really different gingersnap crust.  It was really great and nice to make a pie without the pressure of a holiday.  I have an apple pie in the plans today.

4. Do a handstand without a wall.

This is the goal I haven’t made much progress on.  My husband, an ophthalmologist, attended a lecture on problems caused by increased eye pressure (from doing things like standing on your head), so he has put the kabosh on my handstand practice for now.  I am still doing headstands a few times a week, but not focusing heavily on it.

5. Enter some knitted goods into the State Fair.

I have done some research of different categories and patterns and I picked 5 pieces to try to finish.  As soon as I finish my Olympics hat, I’ll be starting on my first project.  State Fair judging places a higher value on execution than difficulty, so it’s more about making no mistakes than attempting a really difficult or impressive looking pattern.  This is generally not my M.O., so it should be a fun challenge.  I’m hoping to enter a toy, a scarf, a hat, a baby sweater, and possibly a crocheted toy as well.

6. Make 2 successful souffles.

I priced some souffle cups and torches.  That’s it.

7. Finish a triathlon.

I can currently swim and bike the required distances, so my 10k training is kind of doing double duty for this goal, too.

8. Blog.

Thanks for reading!  I’ll keep posting :).

9. Stop using my phone in the car.

I’ve all but stopped.  Occasionally I slip up, but usually just for a second and then I put my phone down.  I’ve definitely broken the habit and it’s nice to have more conversations with my toddler in the car at red lights.

So that’s it – again, thanks for reading and cooking with me.  I’m looking forward to an awesome February.